Create Groups in StREAM@Leeds - SES Guide
You can create, save and use Groups in StREAM@Leeds to create cohorts of individual students across multiple courses, levels and years. Once a Group is created and saved it can be reused by you.
Why would I create a Group?
- Creating Groups allows School SES staff who support digital engagement monitoring to apply Bulk Exemptions where appropriate.
How to create a new Group
2. Select MY STUDENTS from the menu bar that runs along the top of the screen to open the My Students page.
3. Click the SELECT STUDENTS button from the top right of the screen. Empty check boxes will appear to the left of each student's name.
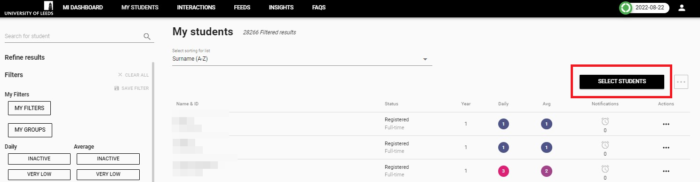
If the SELECT STUDENTS button is greyed out, make sure you don't have a Group filter already applied to your My Students page by clicking CLEAR ALL from the Filters options on the left side of the screen.
![]()
4. Check the boxes of the students you want to add to the group.
IMPORTANT
As you add students an indicator on screen will show the total number of students currently in the group. You can use the search by Surname or use the filter functions to find the students you want to include. During the Group setup process you will also have the option to click the CANCEL button if you no longer want to create a Group.
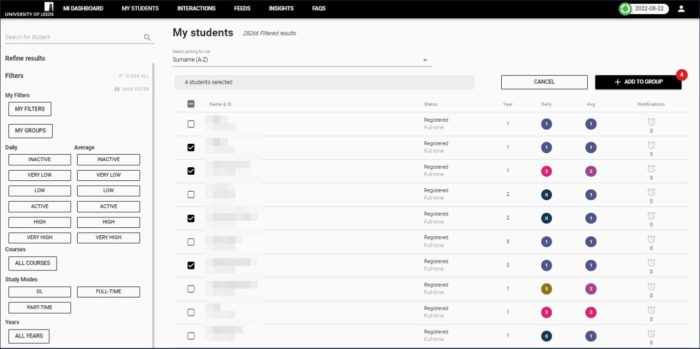
5. Once you have selected all the students you want to include in the Group, click the + ADD TO GROUP button from the top right of the screen. An Add to Group pop-up window will then be displayed on screen. If you have already any created Groups, the Add to Group pop-up window also lists any Groups you have previously created.
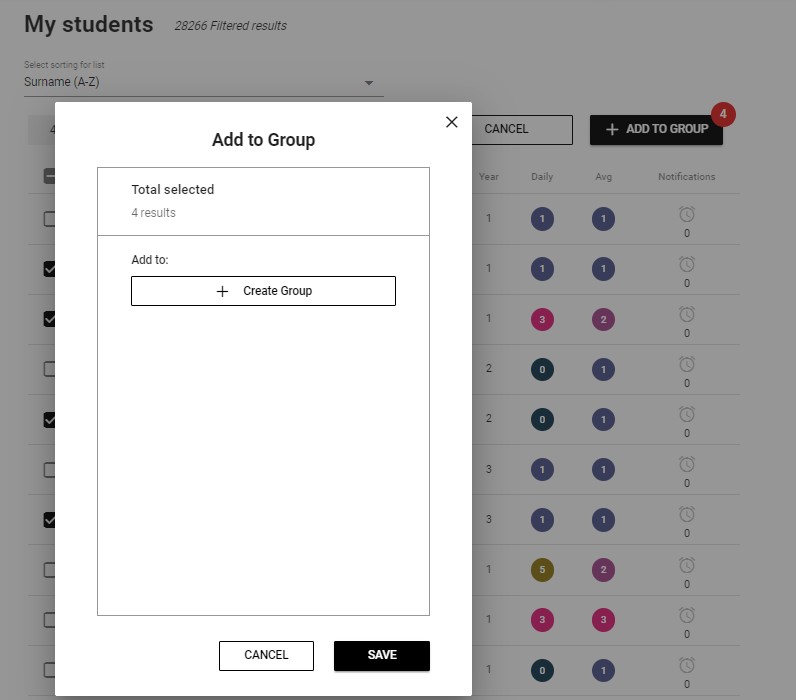
6. Click + Create Group
7. In the Add to field that is then displayed, enter the name you want to give your Group and click Create.
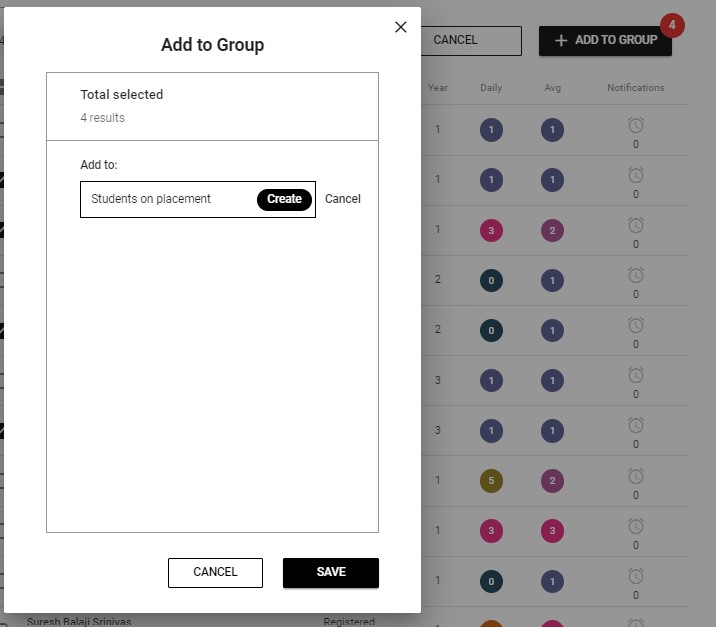
8. Make sure the Group you have just created is selected, (it should have a grey shaded box) and click SAVE. Your Group has now ready to use.
