Accessing and Managing a Class Blog
Accessing student blogs
There are several ways that you can find student blogs that are attached to the class blog. From the main dashboard, hover over My Sites, then My Class Blogs, select the correct class and then click Dashboard.

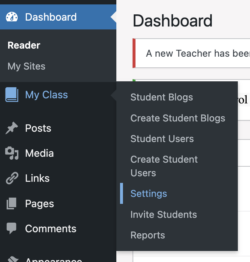
From the left hand menu, select My Class, then Student Blogs. This page gives an overview of each student blog attached to the class blog.

Alternatively, all student blogs will be available from the My Sites dropdown menu from the main dashboard, which will be listed alphabetically. If you are working with a larger class size, this may be more difficult to navigate to a specific blog that you are looking for.
Adding an additional teacher
The instructor who creates the class blog is automatically given a Teacher role, which enables them to moderate any student blogs that are attached. If you need to add more Teachers, you can do this in the Users section.
Access the Dashboard for the relevant class blog. From the left hand menu, hover over Users, then select Add New User.

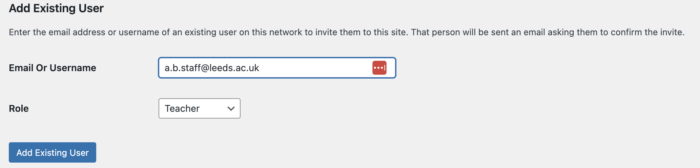
Under Add Existing User, enter the user's full University email address e.g. [email protected], and select the Teacher role from the dropdown menu. Note that the user must have logged into CampusPress previously for an account to have been created for them. Click Add Existing User, and a message will appear to say the user has been added to the site.
Locking a class blog
It may be that you'd like students to stop being able to edit their blog after a deadline has been reached. This can be achieved by editing the moderation settings on the class blog. This must be manually changed by the instructor when a deadline has been reached.
From the main dashboard, select the correct class blog by hovering over My Sites, then My Class Blogs, and select the relevant dashboard.
From the left hand menu, hover over My Class then select Settings.
Scroll down to Moderation On Student Blogs and tick I must approve all posts.

Once this is ticked and the setting saved, students will no longer be able to publish any further posts or pages without this being approved by a teacher. Instead of seeing 'publish' when they create something new, they will see 'submit for review' instead.