Creating a Collaborative Class Blog in CampusPress
A collaborative class blog can be set up where students are required to contribute to the same blog. Setting up a class blog means that the instructor can apply appropriate settings to moderate posts and comments.
Setting up a collaborative class blog
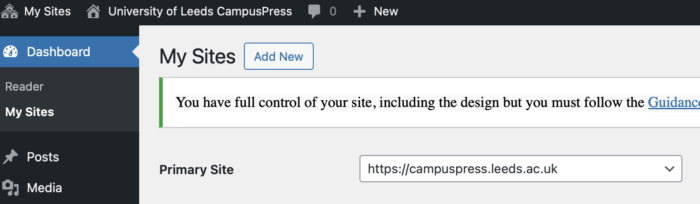
To set up a collaborative class blog, go to campuspress.leeds.ac.uk and login using your University username and password.
From the main dashboard, select Add New
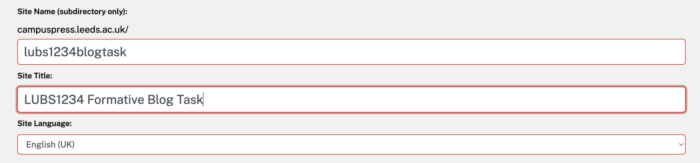
You will now be prompted to fill in a number of fields.
- Site name – Choose a name that reflects the module and activity, e.g. lubs1234blogtask. All letters must be lower case and no additional characters will be accepted. Once entered and saved, this cannot be changed.
- Site title – Choose a title that will be clear to students and reflects the module and activity, e.g. LUBS1234 Formative Blog Task
- Select a template - leave this as None
- Site language – can be left as default
- Privacy – Select 'only registered users of this site’ so that only specifically invited students can access the class blog.
Click Create site. Click on the link with the site title that you chose in the steps to be taken directly to the class blog. A default post will appear, which you can delete or amend later.

Next you will need to turn your blog into a class blog. Go to the dashboard by hovering over the site title at the top of the screen. A dropdown menu will appear where you can select the dashboard.

From the Dashboard, hover over the My Class item in the left hand menu. Select Create a Class.

Tick the 'this is a class blog' box at the top of the page. This will turn your blog into a class blog that students can join.

The Allow Students To Post On The Class Blog settings relate to the blog that you have just created.
- Yes, no moderation: students can post to the class blog and their posts will be visible straight away. This is recommended as it removes extra administration for the instructor.
- Yes, with moderation: students can post to the class blog but they must be approved by an instructor before being visible. Moderation settings are usually only appropriate where content is public facing.
- No: students can't post to the class blog. This is the default option and should only be used where you'd like students to be working on their own blog. Instructions for setting up this type of class blog are also available.
The Moderation on Student Blogs settings can be left as default, as they only apply where students have attached their own blogs to the class.
Make sure that the privacy remains set to Only registered users of this site can view it, so that the content is only visible to those who are invited to join.
Once you are happy with your settings, click save at the bottom of the page.
Inviting student users
You will now need to invite students to join your class blog by creating an invitation link. From the dashboard, hover over My Class in the left hand menu, then Invite Students.

This will open the User Invite option. In the Invite Code field, enter 'student invite'. Leave the default role as Student, and the Site Creation option as 'don't allow users to create a site in process'. Click Add New Invite Code at the bottom of the screen.

This will generate a shareable link which should be shared with students via the Assessment and Feedback folder in your Minerva module page. Note that students must first login to CampusPress to create an account before they can use the link to join the class blog.

When students click on this link, they'll be presented with a Join button to click. Once this has been done, they'll have access to the class blog with a Student role. A student role enables the user to add their own posts and make comments on existing posts.

Adding posts and comments
In a class blog, both instructors (known as Teachers) and students can add/edit their own posts and leave comments on posts unless settings are altered. Comments can only be deleted by a Teacher, or by the author of the post where the comment has been left.
The CampusPress help website has a detailed guide on how to add a post if you need help to get started.
Discussion settings can be altered by going to the Dashboard, and selecting Settings, then Writing from the left hand menu.

By default, Teachers will required to approve all comments that have been left on posts. They will also receive an email to alert them every time a comment has been made. If you are happy for students to leave comments without moderation, leave the Email Me Whenever options and Before a Comment Appears options unticked.

Viewing posts and comments
You can keep track of student posts and comments by going to the class blog Dashboard, and selecting either Posts or Comments from the left menu. As a Teacher, you will be able to edit or delete both posts and comments. You can also use the Reader tool, as explained on the CampusPress help site.
You can also use My Class to run user reports on student activity. The User Report tool is explained on the CampusPress help site.