Import group sets and members in Minerva using CSV upload - Staff Guide
You can import Group Sets and members into Minerva via CSV upload to create several groups at once, or add a large number of members quickly.
Import Group Sets using a CSV upload
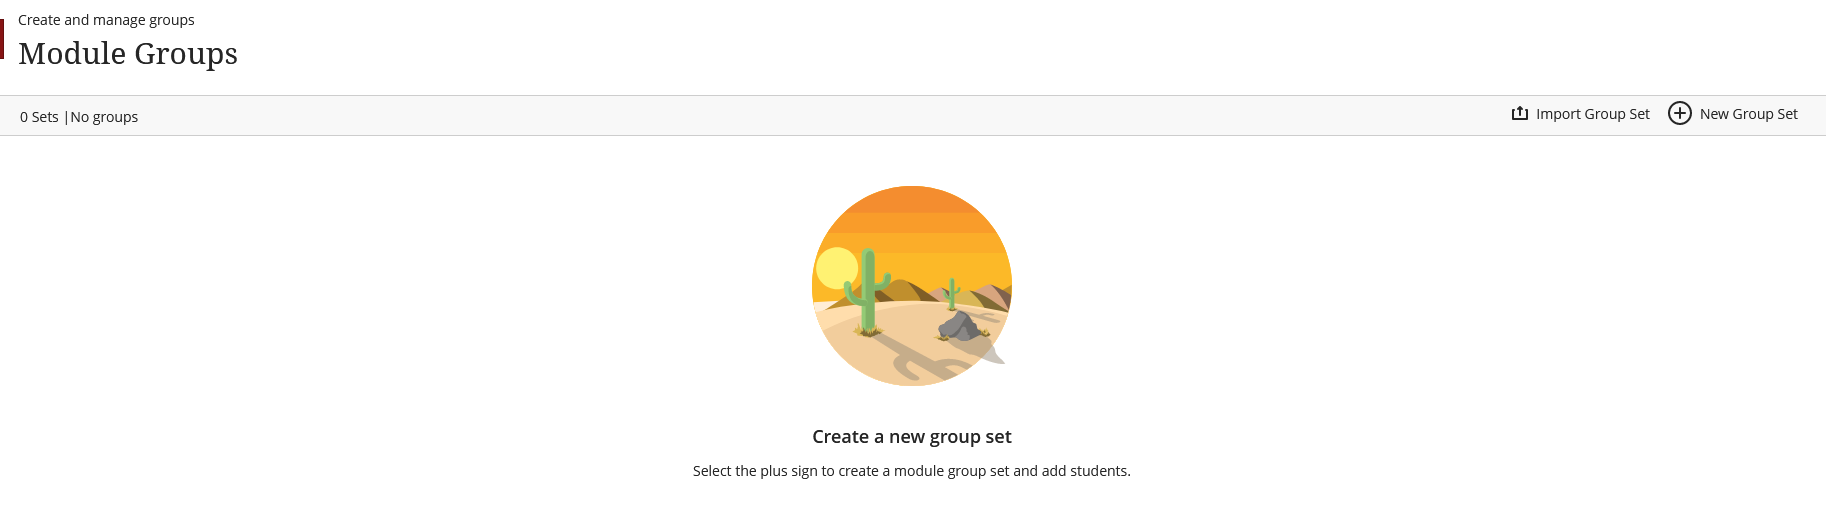
To import Group Sets, first navigate to Groups by following the link in the Navigation bar. This will open the Module Groups page where you can create and manage Groups.
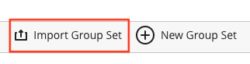
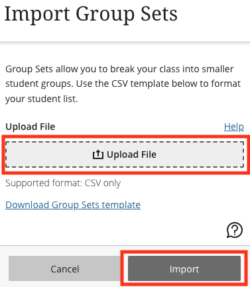
1. To create Group Sets via CSV, click Import Group Set.
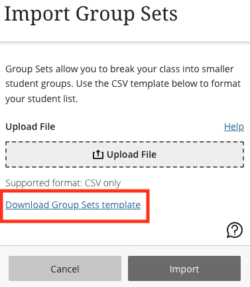
2. Download the Group Sets template from the Import Groups panel.
3. Open the spreadsheet. Leave the first row as it is. Delete the example rows. You now need to enter the required data to create the Groups. Enter in each row information for the specific group.
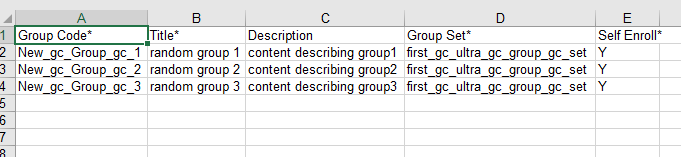
Columns marked with a * need to be populated. (Other columns do not need to be completed).
- Group Code* - Enter a unique code. Don't include spaces (use _ instead). Stick to letters/numbers. Students do not see this information.
- Title* - Enter a name for the Group which will make sense to your students.
- Description - Enter a description if you wish. This will display to students.
- Group Set* – Enter the name for your group set.
- Self enrol - Enter Y if you want to create a self enrol group i.e. a group students can add themselves to.
Save the spreadsheet as a csv file.
4. Return to the Import Group Sets panel in Minerva and click Upload File.
Browse to your saved file.
Click Import.
You will receive an email confirmation when the upload is complete.
5. Refresh the browser and view your imported Group Sets by following the link in the Details and Actions menu, under the Module Groups heading.
You can add group members by assigning them manually or by importing them.
Import Group Members using a CSV upload
1. Click on the name of the Group Set to open it. You should see a list of all the Groups within the set.
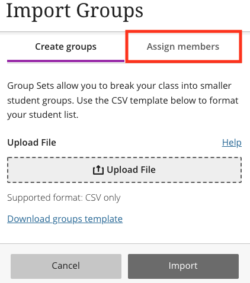
2. Click the Import Groups icon.

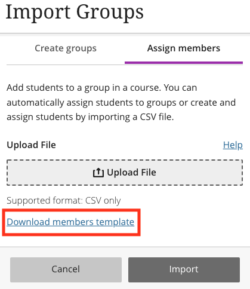
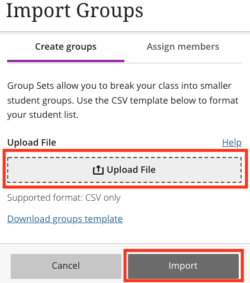
3. Select the Assign members option.
4. Select Download members template.
Open the spreadsheet. Leave the first row as it is. Delete the example rows. You now need to enter the required data to add members to groups as required. In each row you will specify information to add the student to the group: the unique Group Code and the username of the student you wish to add to it.

Columns marked with a * need to be populated. The other columns can be left blanked.
- Group Code* - Enter the unique Group Code. If you created the group via CSV upload, you will have entered this information then. If you don't know the group code it can be obtained by downloading the Group Set.
- Username* - Enter the student's username
If you need to find out the Group Code:
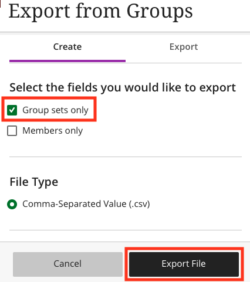
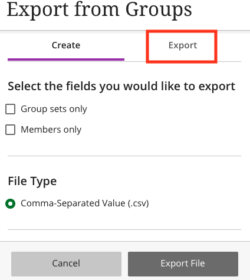
i) Open the Group Set and click the Export from Groups icon
ii) Select the check box Group sets only and click Export File
You will receive an email when the export is complete.
iii) Go to the Export tab where the file will be ready to download.
5. When ready, save the group members spreadsheet as a csv file.
6. Return to the the Assign members tab on the Import Groups panel.
7. Choose Upload File and browse to the saved csv file.
Click Import.
You will receive an email confirmation when the import is complete.
8. Click Save to close the Group Set.