Setting up a Padlet for questions and discussion
< View Padlet: Guides for Staff home page
< View Padlet: Guides for Students home page
Padlets can be used for students to ask questions or discuss a topic synchronously or asynchronously. They can allow you to consider and respond to questions when you are ready, avoiding an online chat from becoming a distraction. Also, they can allow students to respond to questions posed by their peers and add reactions.
Padlets can be also be used for discussion - post the topics you want your students to discuss and allow them to add comments to them. They can be embedded into a Minerva module or organisation and Microsoft teams, and used as a revision resource in a way that is not easily replicated in a chat
Staff and students can contribute to a Padlet simultaneously. Posts that are added appear immediately in real time. There are a number of formats available in Padlet and in this guide we will take a look at the ones that work well for questions and discussions.
For Questions
The Stream format in Padlet is suited to questions as posts are shown chronologically (you can choose newest to oldest or vice versa). You can see a Padlet that has been set up for questions. Give it a try by adding a question which you can do by clicking the plus button on the bottom right. Please note that questions added to it will not be answered.
This Padlet has been set up so that:
- The newest questions appear at the top.
- The name of the person who has posted is not visible.
- Other students, including you, can leave comments on a question that has been posted.
- Other students, including you, can like a question that has been asked.
For Discussions
The Columns format in Padlet is suited to discussions as you can set up topics beforehand. You can see a Padlet that has been set up for discussions. Give it a try by adding a post under one of the topics. You can do by clicking the plus button directly below the topic you want to add a comment to.
This Padlet has been set up so that:
- The name of the person who has commented on a discussion topic is visible. This is if they are logged into Padlet, if not, then it will be anonymous.
- Other students, including you, can like a post.
- Students cannot create a new discussion topic.
Creating a Padlet for questions or discussions
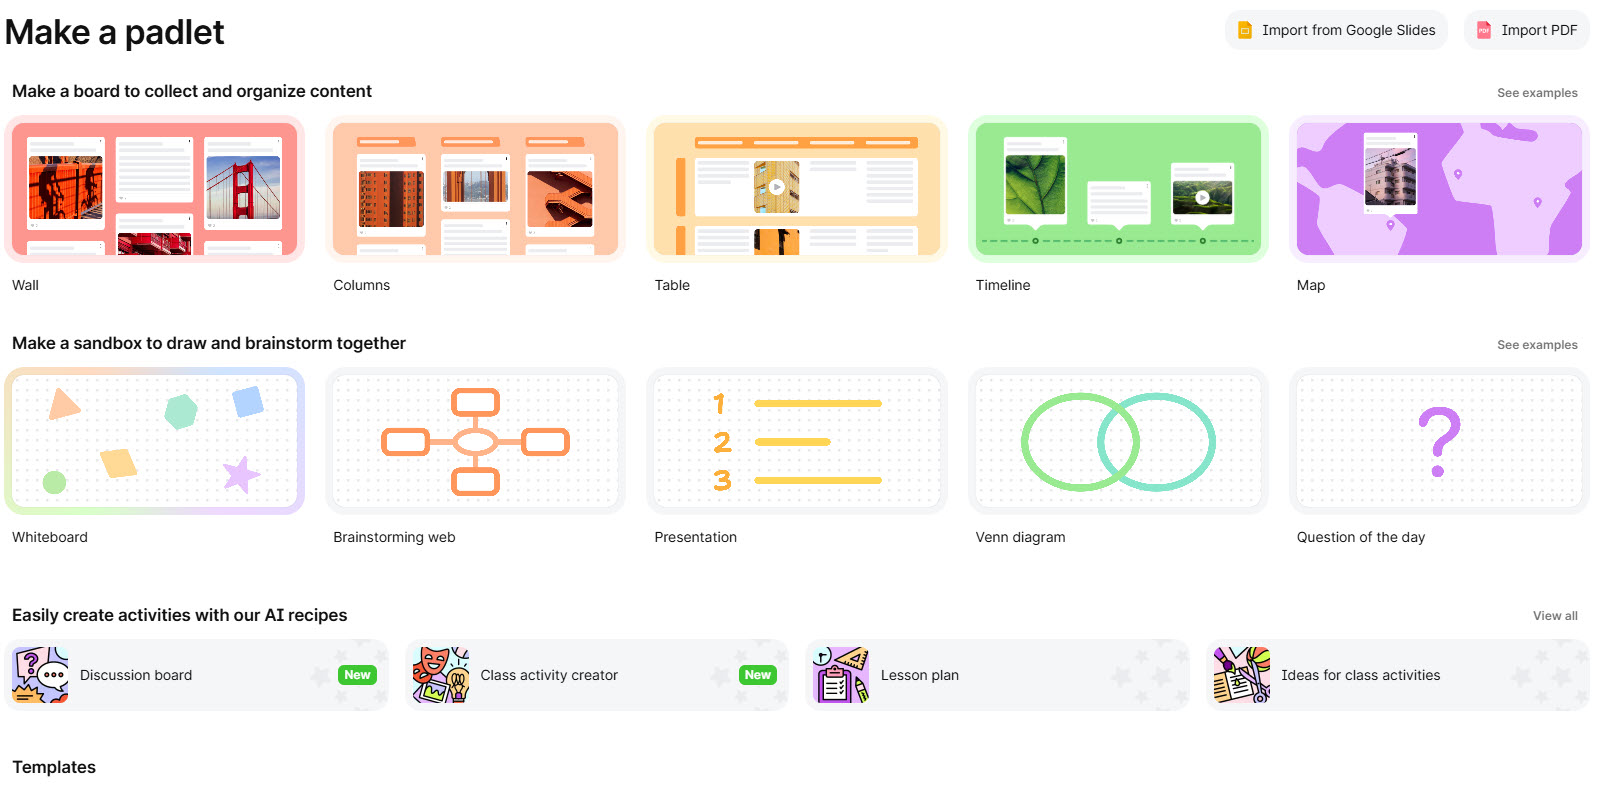
- Select the Make button.

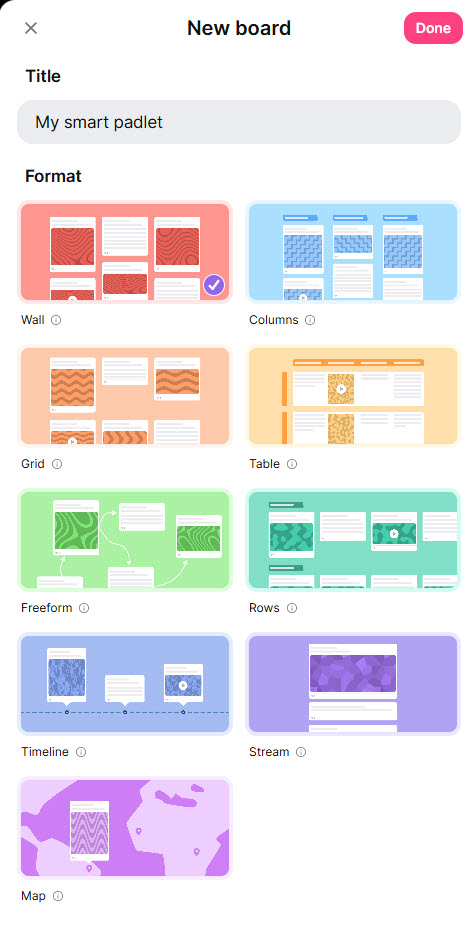
- Choose a Format. For example, Wall, Coumns, Table, Timeline or Map. Or choose a Sandbox or Template.
- Padlet adds a default title. Amend the title and if you wish amend the Format, you can choose a Format and then select Done.
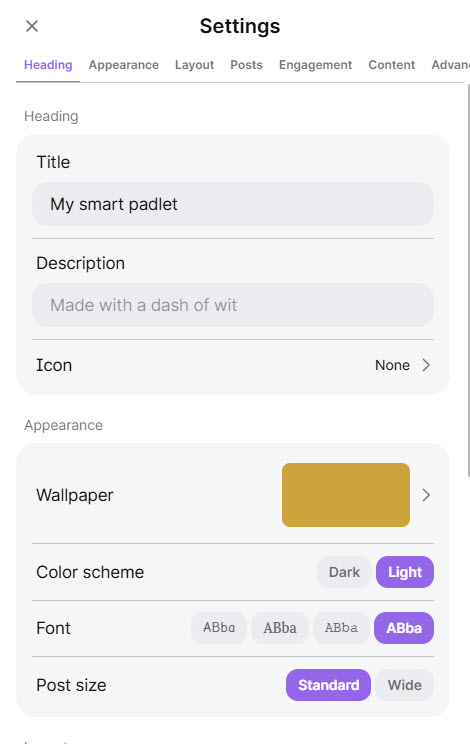
- From the Padlet settings button (or cog icon) you can add a description. You can also change the wallpaper but avoid white because it can make comments difficult to see.
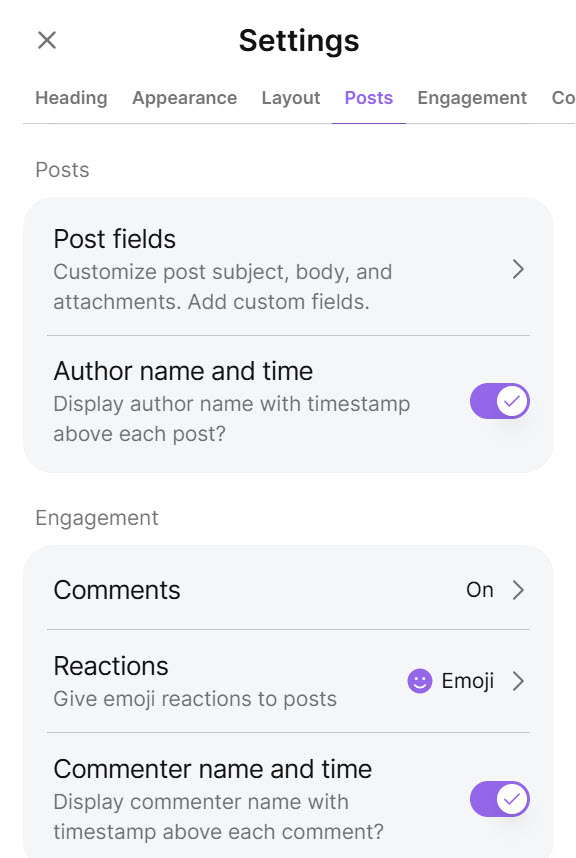
- Enable or disable posting and content settings such as displaying the author names on posts, allowing post comments and post reactions.
You can change the format used for a Padlet after it has been created. For more information, see the Change the template format used for my Padlet guide.
If you are using the Columns format, add discussion topics by selecting Add section. Rename topics by selecting on the Sections actions button (or ellipsis) next to a topic and select Rename section.
You can reorder the discussion topics by holding and dragging one and moving it around your Padlet.
Set your privacy and visitor permissions
To allow others to view and contribute to your Padlet, you need to set the appropriate privacy and visitor permission for this purpose.
- When your Padlet is ready to share, select the Open Share panel button (Share icon).
- Under Permissions, set the permission level for 'Visitors with a link' (No login required) and/or 'University of Leeds members' (University of Leeds login required). By default, both are set to 'No access'. Please see the different permission levels below.
Permission levels for Visitors with a link
- Reader – Visitors can access the Padlet and read posts.
- Commenter – Visitors can comment on posts and add reactions.
- Writer – Visitors can write new posts (this is the most common and recommended choice).
- Moderator – Visitors can write, edit and approve posts.
Permission levels for University of Leeds members:
- Reader – Members can access the Padlet and read posts.
- Commenter – Members can comment on posts and add reactions.
- Writer – Members can write new posts (this is the most common and recommended choice).
- Moderator – Members can write, edit and approve posts
- Admin – We do not recommend using this option. If this is selected anyone who accesses Padlet will have full admin rights to it.
Important: University of Leeds permissions cannot be more restrictive than visitor permissions. If visitor permissions are set higher, the University of Leeds member permissions level will automatically match them.
Sharing with an individual user
If you want to share and collaborate with another user rather than with a group, you can share your Padlet with an individual user while having the Private privacy option. For instructions on this, see the Share and collaborate on Padlet with an individual user guide.
Sharing your Padlet
There are a number of ways to share a Padlet once the permission level has been set:
- You can copy a Padlet link to clipboard and share it, for example, in an email or in a chat message.
- You can embed in Microsoft Teams. For instructions on this, see the Embed a Padlet into a Microsoft Team channel guide.
- You can add a Padlet in a Minerva module or organisation For instructions on this, see the Add a Padlet to a Minerva Module guide.
- Generate a QR code to be scanned by users via the Padlet app or with the device camera.
- You can create a slideshow of your Padlet and share the Slideshow link with your users.

Page last checked: April 2026
< View Padlet: Guides for Staff home page
< View Padlet: Guides for Students home page