Creating a PebblePad Template - Staff Guide
Templates are designed to guide the process of creating records of learning and experience. A Template is an empty form with one or more questions or prompts for the user to complete. PebblePad comes with a number of default templates that are generic and designed to support learning in a range of contexts. These include an action plan, reflective frameworks, forms for recording talents (abilities and achievements) and different types of experience records. The category of template will be reflected in the icon that appears next to its title icon in the store - Plan, Experience, Reflection or Talent or Worksheet.
Custom templates can be made available to you by others, and you can even design your own.
1. Creating your template
To create a new template, first click the Burger menu ≡ and select Get Creative and Create a template from the menu. This will open a new template ready to start adding content.
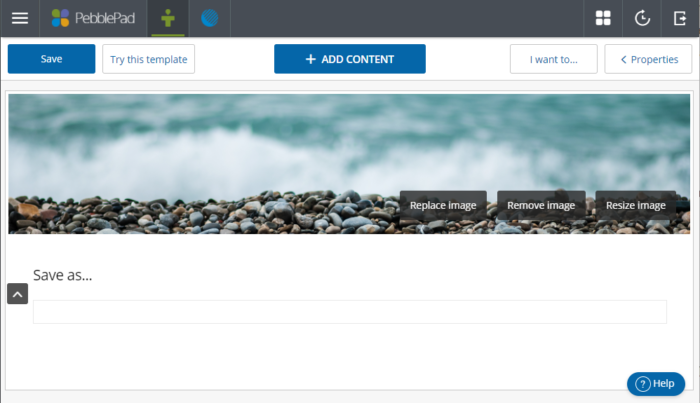
The page already contains a default PebblePad banner image which you can replace with another from the PebblePad store or your own asset store. Click Replace image to access these. You can now begin to add content using the Add content button. You have access to the full range of content elements available for workbooks which you can click to add or drag onto the template.
Tip: You can tell you are in template builder mode if you can see the Try this template button.
2. Adding content to your template
The content blocks are called elements in PebblePad and are displayed in a menu which appears when you click the Add content button.
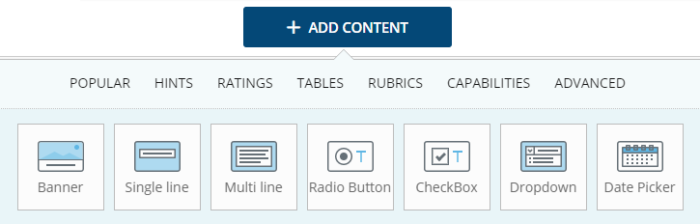
Clicking an element type adds it to the page and it will appear below the last one you worked on. They can also be reordered with the arrows at the side of the block frames. You can also drag the elements onto your page.
The active block can be deleted by clicking the X in the top left-hand corner and clicking Confirm.
Tip: Click into a content block to make it the active one.
PebblePad provides a comprehensive guide to all the content element types in a downloadable PDF from the Learning Centre.
3. Using the Properties Panel
Whichever content block you are using, it has its own set of properties accessed by clicking the Properties Panel in the top right-hand corner and then selecting Block.
Tip: You must have the relevant active block selected for the properties panel to show its criteria.
You can access properties in the panel for the template as well as the individual block.
4. Saving your template
You are prompted to Save the template. This will put it into your Resource Store as a Single Use template which you can share for reuse. The recipient will open, save the template and it will go into their Asset Store. They can only use it once. If you want it be reused more than once, then you must make it multiple use. Go to the Properties Panel and select the checkbox Allow re-use without prompting.
5. Renaming and deleting a template
You can rename or delete your template from the Resource Store by clicking on the icon to the left of its title. Go to the i on the right-hand side, click Edit and rename the template. If you wish to delete the template , go to the I want to … button at the bottom right-hand corner and click Delete.
Further Help and Support
There are several ways to access help and support from within PebblePad once you are logged in. The Learning Centre is a good place to start, it contains short how-to videos, a useful glossary and tip sheets.
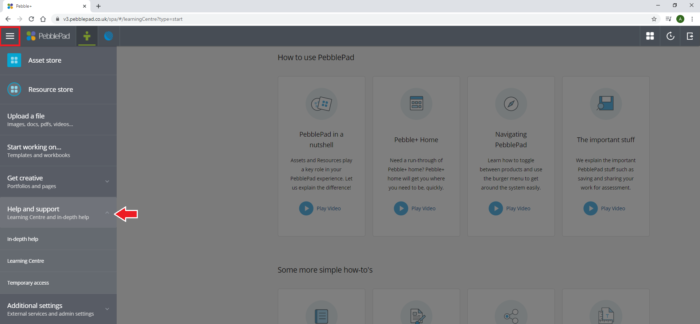
You can also open the Burger Menu to find the Help and support section; this contains in-depth help guides covering a wide range of topics.
Support is also available via the Leeds IT website. Please remember to log in as this will give you additional support options.