How to create a Blog using PebblePad - Student Guide
Blogs are very powerful tools that can make explicit your connections with learning, encourage critical reflection and, if shared with others, provide opportunities for peer support and collaborative learning. As they are chronologically-based, blogs are useful for tracking development over time, such as following the stages of a project or for documenting your own learning processes over time.
There are several ways you can choose to use PebblePad's blog feature, depending on the purpose of the entries you intend to post and the audience (if any) you wish to share it with:
- as a private, reflective space for recording your thoughts and insights, very much like a journal or diary.
- as a formalised record of an experience, such as a placement or conference, which may be read by an assessor or peers.
- as a record of readings, resources and thoughts as you progress through a unit of study or period of professional development, which may be shared with others.
- as a discussion space on which you may allow others to comment or even to contribute entries.
PebblePad is designed to give you control over how your blog looks, is structured and who you allow to have access.
1. Creating your blog
To create a new blog, first click the Burger menu ≡ and select Get Creative and Create a blog from the menu. This will open the blog builder, allowing you to start creating your blog by adding content. The blog already contains a default PebblePad banner image which you can replace with another from the PebblePad store or your own asset store. Click Replace image to access these.
The first thing you are prompted to do is give your blog a description, before you start building your content.
2. Adding content to your blog
Click the Add to your blog button.
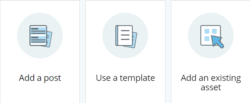 You can now do one of three actions:
- Add a post
- Use a template
- Add an existing asset
Tip: Before you can add the first post, you will be prompted to save your blog and give it a name.
Add a post – If you click Add a post, you will be first prompted to give your blog a title and save it. Then a new page for your post will appear with a banner and you will be prompted to add a title for your new post. You now have the same options to add content blocks as you would for creating a page or a portfolio. Have a look at guide numbers 6 and 8 for more help on adding content to your blog. When you have finished creating your post, click the link to go back to your main blog.
You will now see a listing of your blog posts.
Posts can be edited, made private, commented on and deleted.
Use a template – If you click Use a template, you will be prompted to add a blank template from your asset store.
Add an existing asset – If you click Add an existing asset, you will be prompted to add an asset from your asset store. This could be any file, portfolio, collection or page that has been added to the store. It will be added as a link to the asset.
3. Saving your blog
You will be prompted to save your blog before you can first preview it. This will save it into your Asset Store.
4. Renaming and deleting a blog
You can rename or delete your blog from the Asset Store by clicking on the icon to the left of its title. Go to the i on the right-hand side, click Edit and rename the blog. If you wish to delete the blog, go to the I want to … button at the bottom right-hand corner and click Delete.
You can also share and copy your blog from the same button. If you use the I want to … button within the blog, you can also print.