Sharing Assets in PebblePad - Student Guide
All of your work in PebblePad is completely private until you choose to share it with others (or it has been set-up by your Tutor for auto-submission). You never share your whole PebblePad, instead you choose which assets you want to share, with whom, and for how long. Any of your assets can be shared with people, shared for assessment or shared on the web.
Here's a quick overview on how to share your assets in PebblePad
Let's look at two of the most common ways you can share an asset for others to view:
A: With people - this means you are sharing you asset with an individual or individually named group of people (even if they don't have a PebblePad account).
B: Share with the web - this means you are sharing a link to your asset so that anyone with the link can see it.
If you have been asked to share an assessment, the process you will follow is different, please see, Sharing Assets for Assessment.
A. Sharing an Asset with people
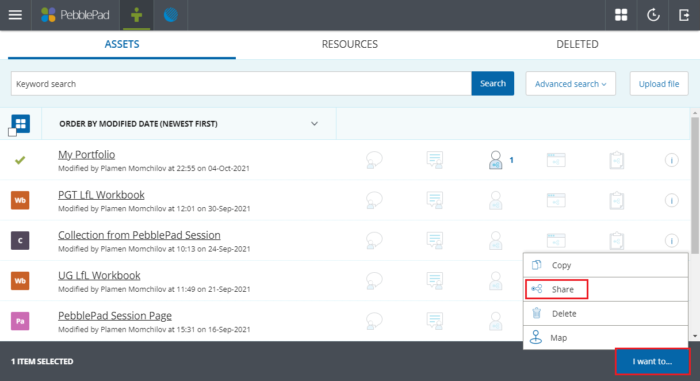
1. Go to your Asset Store, and select the asset(s) you want to share by clicking the check box to the left of its name. You can select multiple assets to share.

2. Click the I want to... button in the bottom right-hand corner of the screen and then select Share.
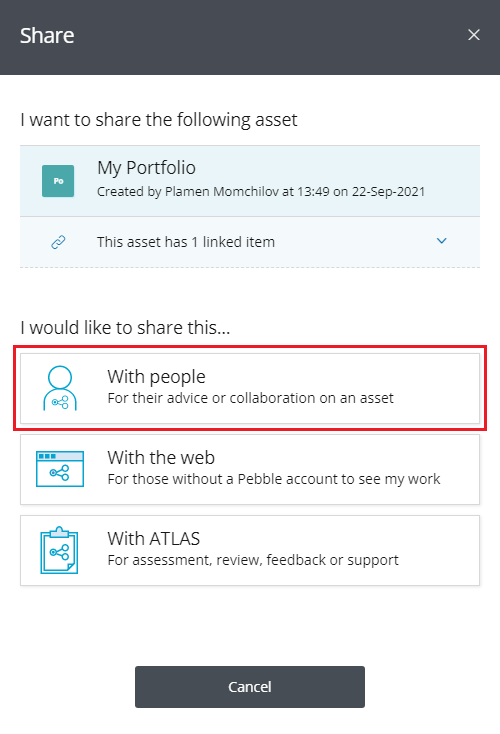
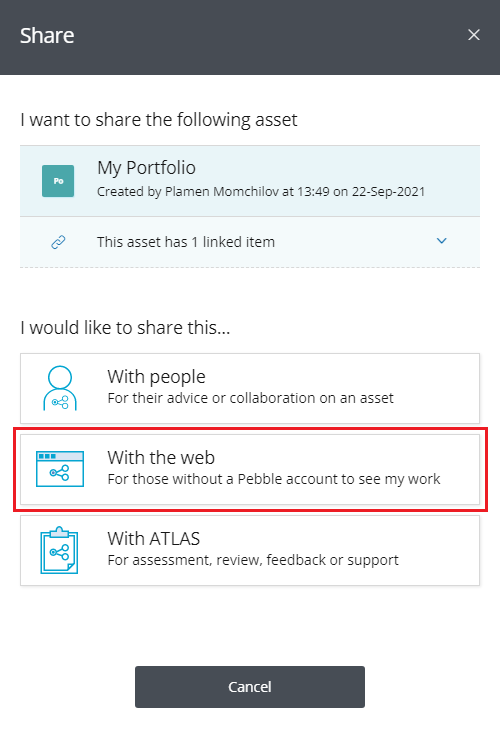
1. Select I would like to share this... With people
2. Enter the email address or name of the person you want to share with if they are a University of Leeds staff or student. If they are outside of the University of Leeds skip to step 6.
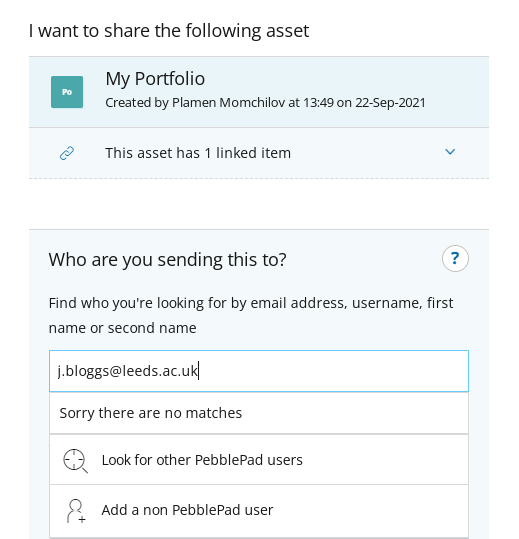
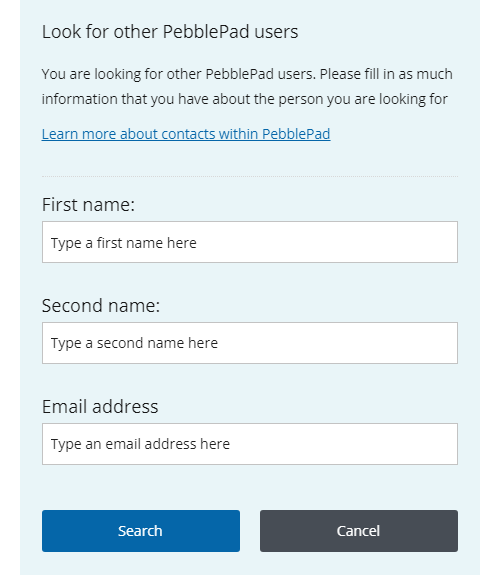
3. If a match for their name is not returned, select Look for other PebblePad users. Enter the details of the person you want to share the asset with. Click Search.
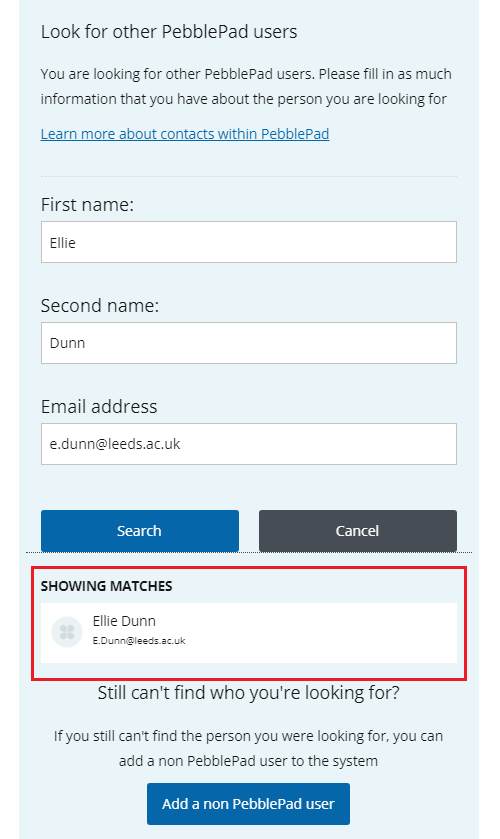
4. When the system has shown a match for the person you are looking for, click on the match to add them. You can proceed to Step 7.
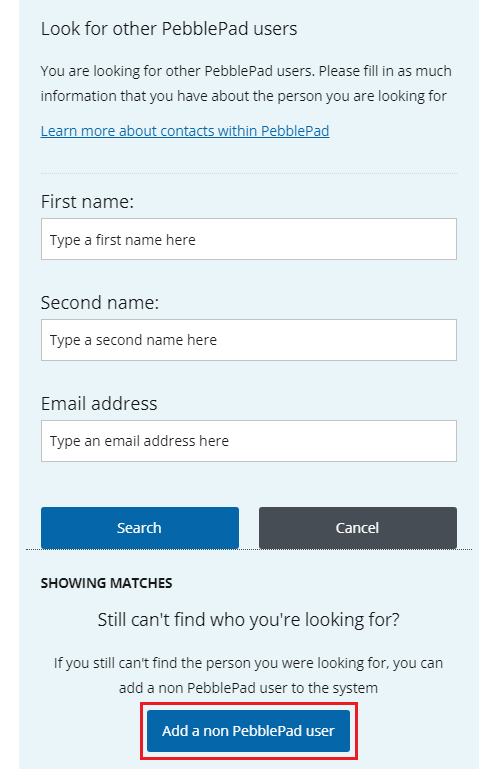
5. If the system still doesn't show a match, click on Add a non-PebblePad user.
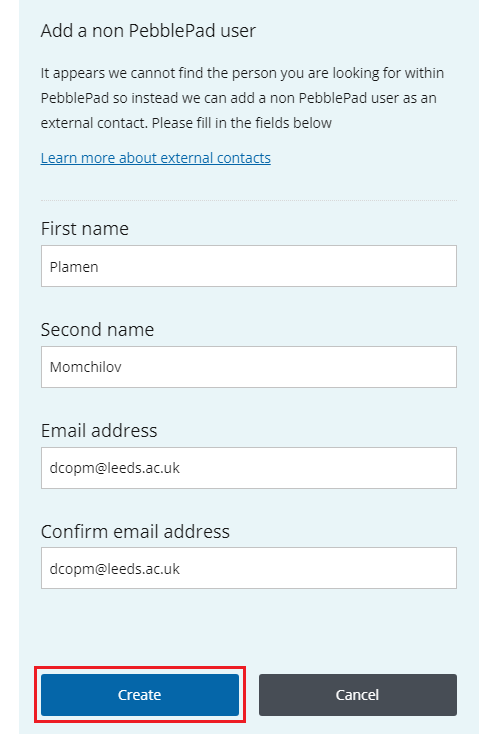
6. Enter the details of the person you want to share the asset with. Click Create.
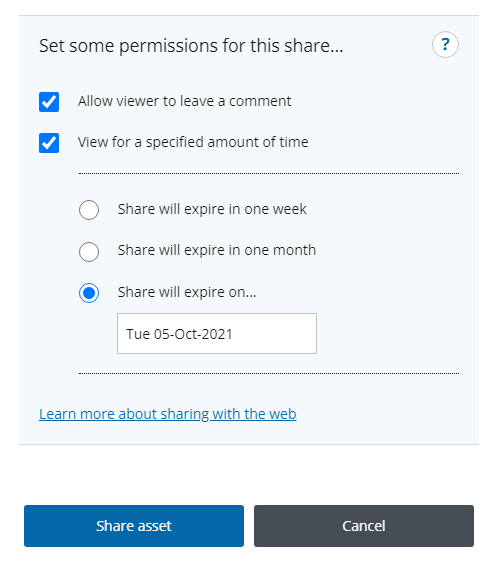
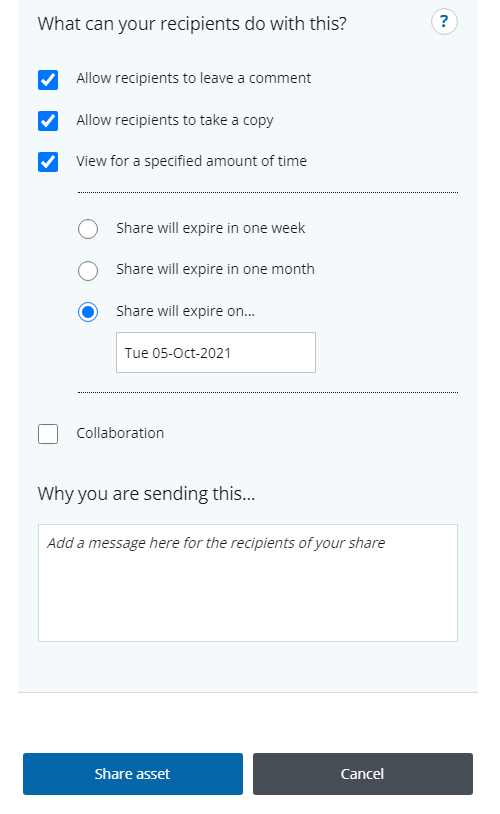
7. Select the share permissions you want the recipient to have from the four options available.
- You can allow recipients to leave comments. Please note that comments added to your asset will remain on it and will be visible to others.
- You can allow recipients to save a copy of your asset into their own Asset Store.
- You can limit the length of time the link is available. You can select Share will expire on... to set a specific date for the share to expire.
- You can allow recipients to collaborate and give them the same permissions over the asset as you do.
IMPORTANT
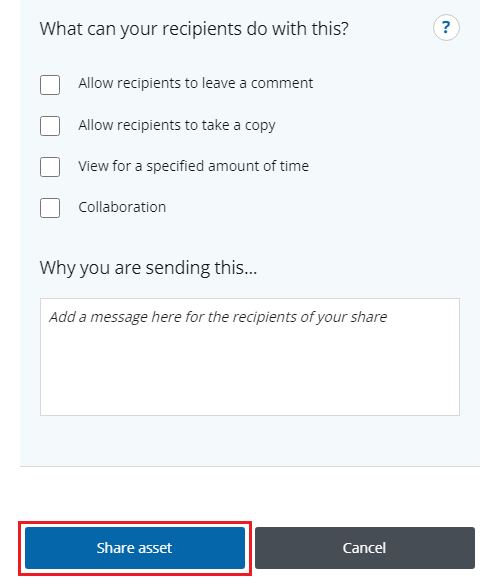
8. You can leave a message for the recipient. Click Share Asset to complete the setup.
B. Sharing an Asset with the web
1. Go to your Asset Store, and select the asset(s) you want to share by clicking the check box to the left of it's name. You can select multiple assets to share.

2. Click the I want to... button in the bottom right-hand corner of the screen and then select Share.

3. Select I would like to share this... With the web.
4. Select the permissions you want viewers to have.
- You can allow viewers to leave comments. Please note that comments added to your asset will be visible to others who can view the asset.
- You can limit the length of time the link is available. You can select Share will expire on... to set a specific date for the share to expire.
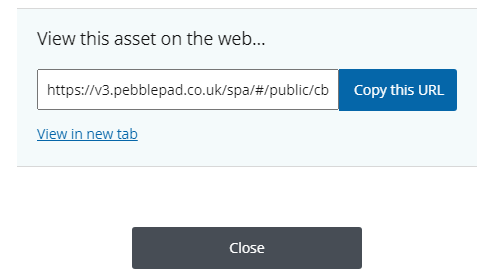
3. A link to your Asset will be created. Click on Copy this URL to save it to your clipboard and then Close to complete the setup. Anyone you share this link with will be able to view your Asset (and they in turn can also share the link with others).
Unsharing an Asset
You can go into the info panel of your asset at any time (by clicking on the (i) in your Asset store) and edit or remove the share.
Further Help and Support
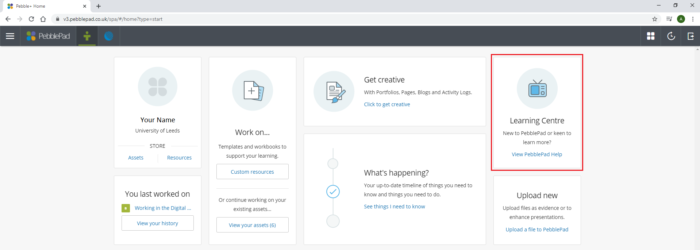
There are several ways to access help and support from within PebblePad once you are logged in. The Learning Centre is a good place to start, it contains short how-to videos, a useful glossary and tip sheets.
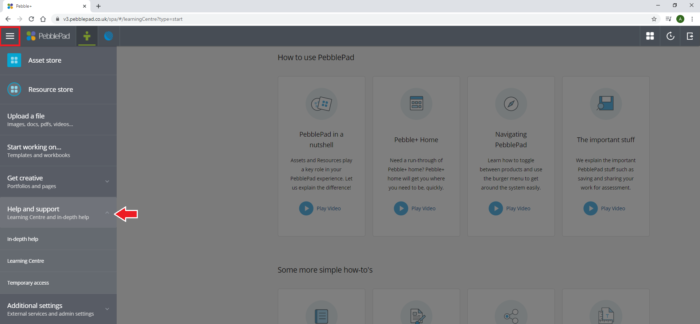
You can also open the Burger Menu to find the Help and support section; this contains in-depth help guides covering a wide range of topics.
Support is also available via the Leeds IT website. Please remember to log in as this will give you additional support options.

