Share your Padlet
< View Padlet: Guides for Staff home page
< View Padlet: Guides for Students home page
When you have created a Padlet, you need to set your privacy settings before it can be shared with others to view or contribute to. You can watch the following video or use the written guidance further below.
Set your permissions
When you create a Padlet the default privacy is Private. This means that others cannot see it because it is only available to you.
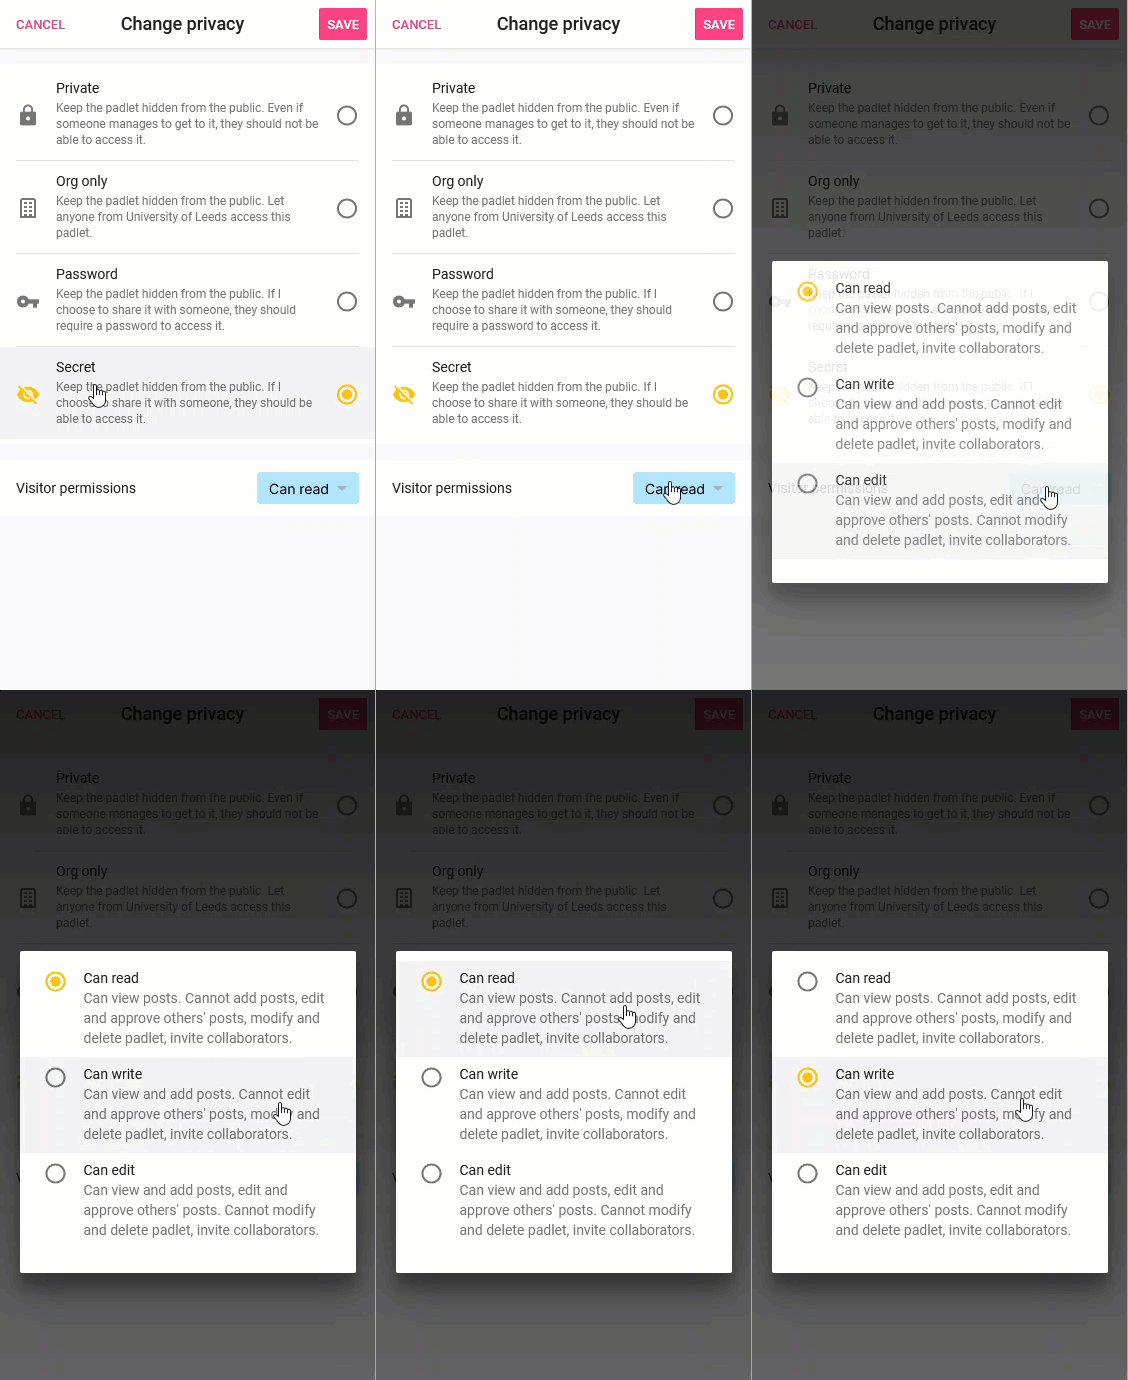
1. When your Padlet is ready to share, click on the Share icon on the right, then click on Change privacy and select Secret. While Secret sounds like an odd choice, this is the most common option as it allows your Padlet link to be shared.

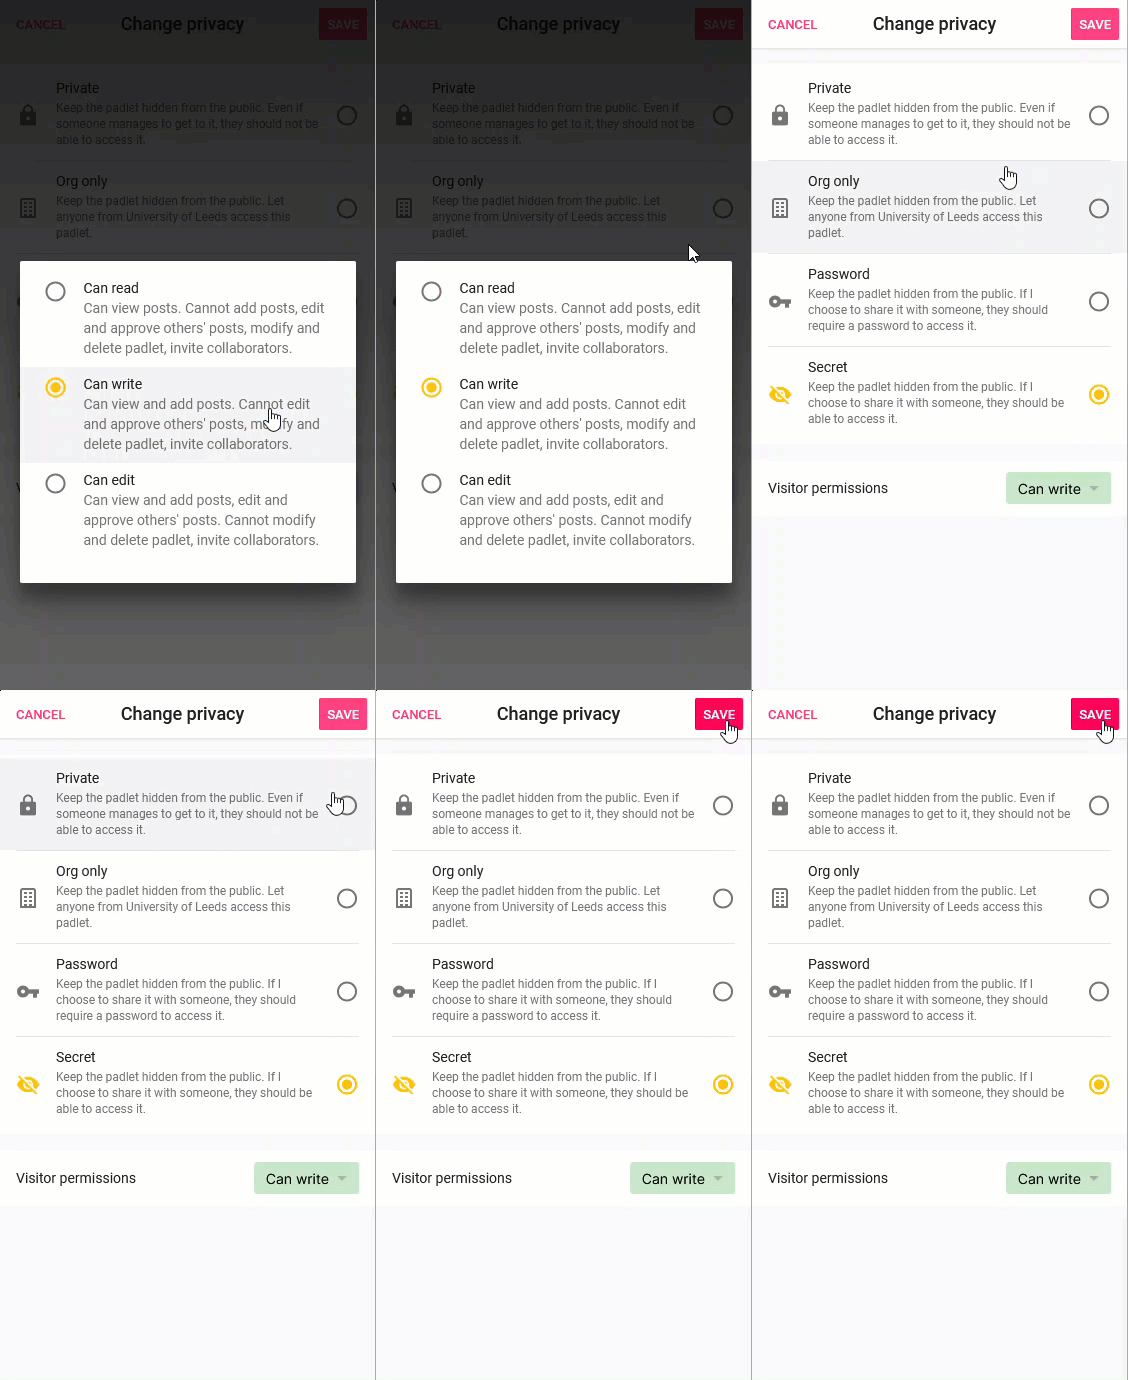
2. After you have selected the privacy option, click on the Can Read dropdown menu and select one of the visitor permissions that best suits your Padlet.

3. Click anywhere on the grey background to close the permissions screen and then click Save.

Sharing with an individual user
If you want to share and collaborate with another user rather than with a group, you can share your Padlet with an individual user while having the Private privacy option. For instructions on this, see the Share and collaborate on Padlet with an individual user guide.
Sharing your Padlet
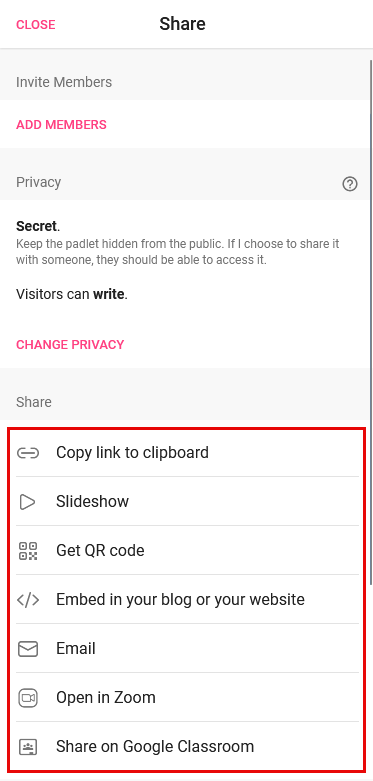
There are a number of ways to share a Padlet:
- You can copy a Padlet link to clipboard and share it, for example, in an email or in a chat message
- You can embed in Microsoft Teams. For instructions on this, see the Embed a Padlet into a Microsoft Team channel guide.
- You can add a Padlet in a Minerva module or organisation For instructions on this, see the Add a Padlet to a Minerva Module guide.
- Generate a QR code to be scanned by users via the Padlet app or with the device camera.

Related Guides
Guidance for students on using Digital Education Systems to publish/share content online
< View Padlet: Guides for Staff home page
< View Padlet: Guides for Students home page
