Add files - Staff Guide
You can add a variety of content types to your module or organisation. This guide explains how to add files.
If you’d like to add rich content that combines a variety of materials to view together, such as text, multimedia, and attachments see, create a Document.
There are 3 ways to add files. You can use:
By default, students view files in the browser and have the option to download. Read more about this in the section on How students view files.
Upload
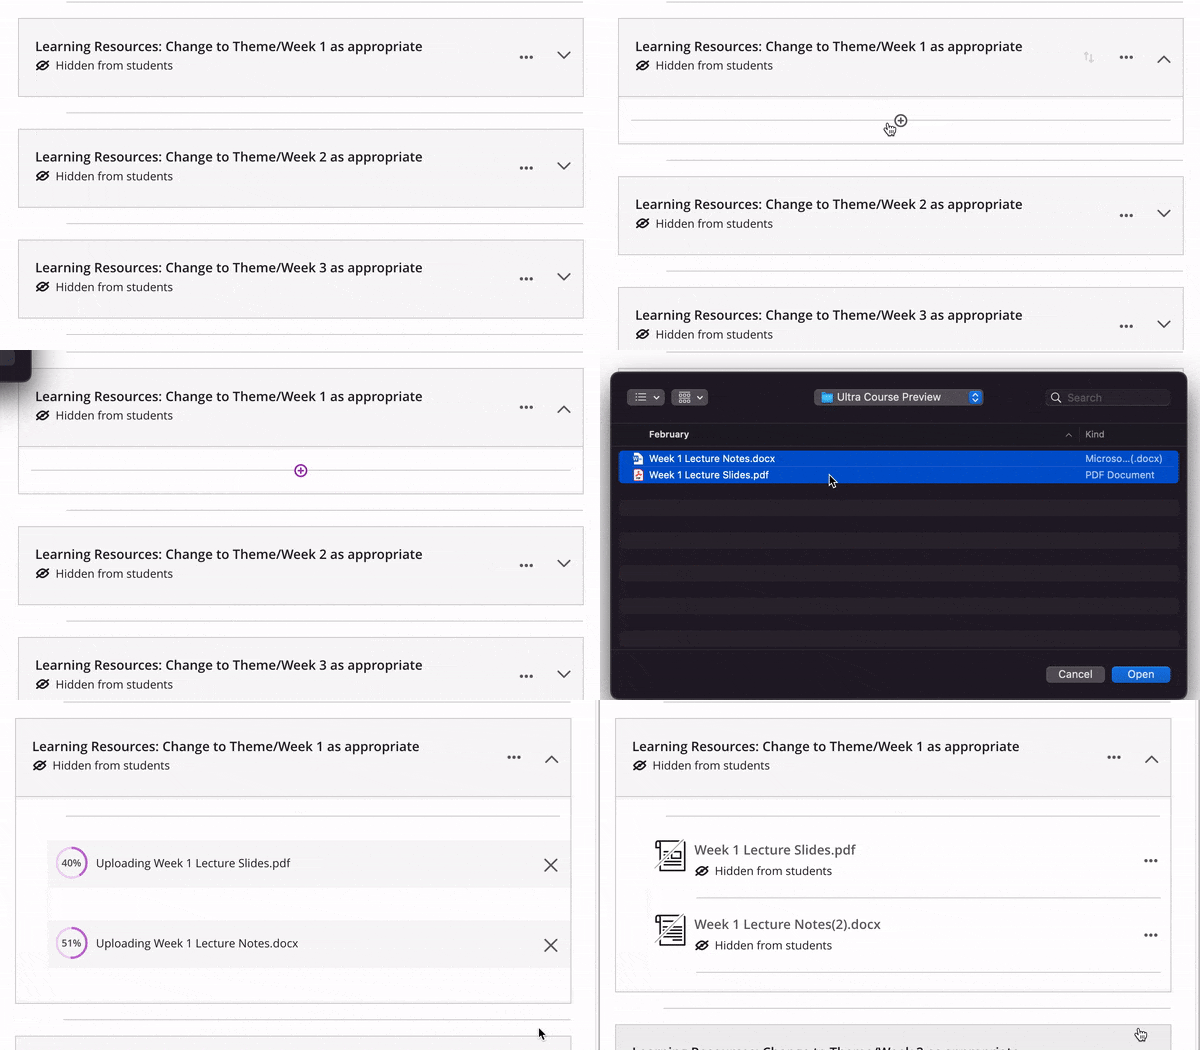
Within the Module Content page select the + icon wherever you want to add content. You may need to hover beneath content items to make the + icon appear.
- Navigate to the appropriate area and select the + icon
- Click Upload
- Select the file(s) you want to upload, use the Ctrl key (CMD key if using a Mac) to select more than one file.
- Click Open
- The file(s) will be uploaded

To add content to folders/learning modules, click on the folders and learning modules to open them. Then look for the + icon to add content to your folder or learning module.
Go back to the top of this page
Drag and drop
You can quickly add files, or folders of files, to module content/folders/learning modules via drag and drop.
To do this you will need to locate the file(s)/folder (s)* you want to upload, use your mouse to select the file(s) you want to upload, then drag them into the relevant area within the module. Use the Ctrl key (CMD key if using a Mac) to select more than one file.
*When using drag and drop to upload folders of files, this will create a Folder in the module containing your files. It is important to note that this can't exceed 2 levels of structure. If you attempt to add a deeper structure, any folders that exceed the limit of 2 levels will be discarded. For example, if you tried to add a folder with a subfolder to an existing learning module the subfolder would not be added and you would see a notice informing you that 'Some folders were discarded due to the maximum number of subfolders being reached' at the top of the page.

Go back to the top of this page
Add files from Cloud Storage
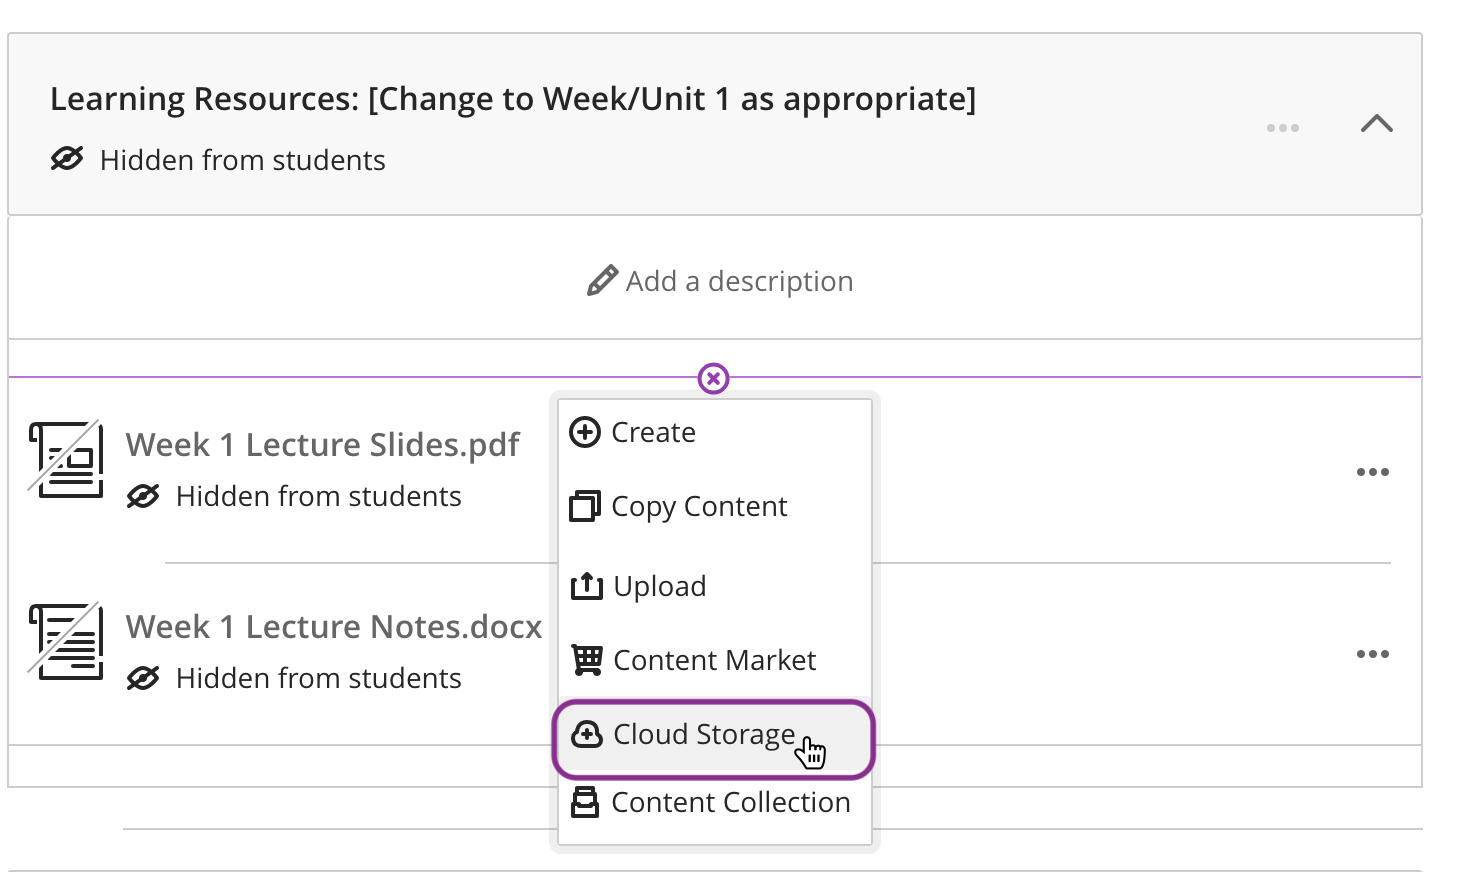
Files can also be added directly from your University of Leeds OneDrive account by selecting the + icon in the relevant area, then clicking Cloud Storage, OneDrive then Connect. You can then add one or more files. You may need to hover beneath content items to make the + icon appear.
Adding files in this way adds a copy of the file to Minerva.
For more information see, Add Files from Cloud Storage.

Go back to the top of this page
Add files from the Content Collection
All files added to a module/org are automatically stored in the module/org area in the content collection.
However, if you have a file you want to share amongst many modules (this would typically be a School/Faculty wide document) further information on how to do this can be found in the Add files from the Content Collection guide.
Go back to the top of this page
How students view files
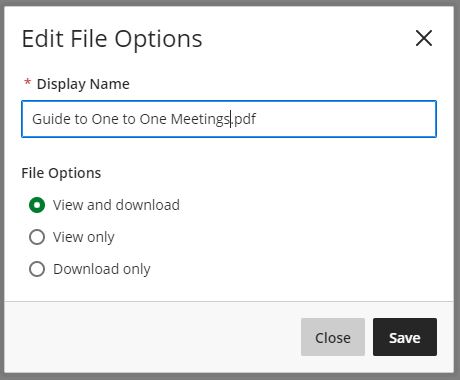
Most files can be viewed in the browser by default (so students do not need to download a copy). When you add a supported file type (PDF, DOC, DOCX, PPT, PPTX, XLS, XLSX, ODS, ODT, ODP), you will have the option to either allow the student to: view and download, view only, or download only. View and download is the recommended option. However, the file will be converted to display in the browser, so for complex/important files, we suggest you review the file online and if the format is negatively affected, switch the option to download only. Click the three dots icon next to the uploaded file if you need to review these options.

